Briefly: which Makcu board to look for
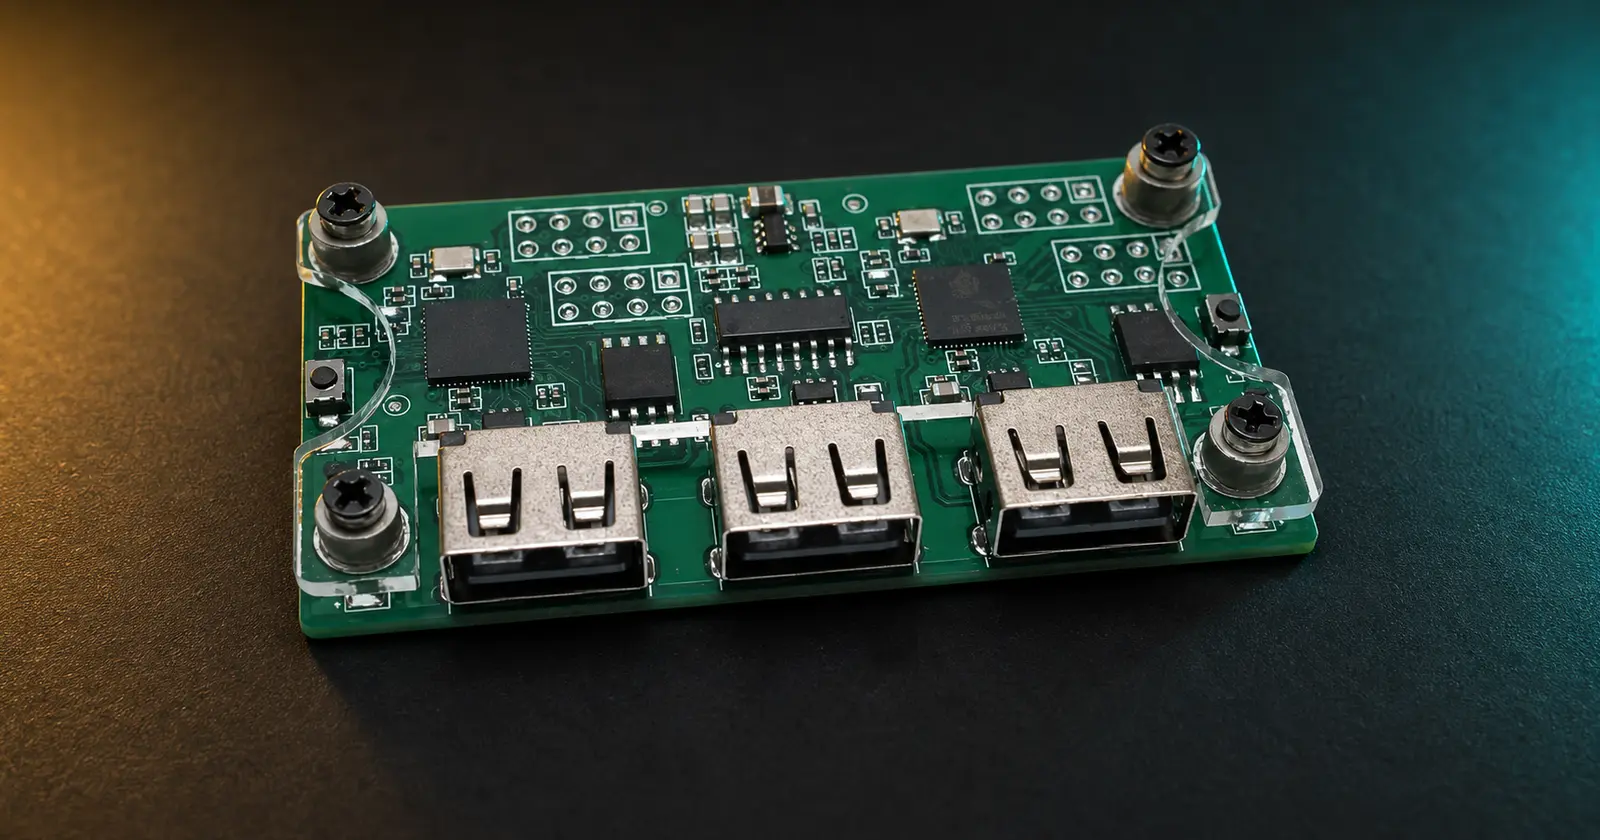
The correct Makcu for the described scheme is a board with two ESP32-S3 microcontrollers, three USB ports in one row, and two separate Boot buttons on the edges. For normal operation you will need two data-capable USB cables, while a mouse or its USB receiver is connected to the third port.
If the board arrives unprepared, both controllers must be flashed in sequence: first the left side through USB1, then the right side through USB3. The ready-made TopMacro kit is already flashed and tested, so it does not require this procedure. Step-by-step images and current files are available in the dedicated TopMacro guide for Makcu.
What is Makcu ESP32-S3 and how does it work
Makcu is a hardware USB bridge for input devices. It sits between the computer and the mouse: it receives USB signals from one side, processes commands from the control software, and passes the final stream to the other side. This design is useful not only for gaming profiles, but also for interface testing, control remapping, automation, and accessibility tools.
The main difference from a simple ESP32-S3 DevKit is its dual-controller architecture. In the open-source MAKCM project, the left and right sides have different tasks: one behaves as a USB device for the computer, while the other works with an attached mouse as a USB host. The controllers exchange data with each other. Therefore, a generic ESP32-S3 board with one chip and two connectors is not a full replacement for Makcu.
The board does not read game memory, create an on-screen overlay, or become a standalone 'aimbot'. It processes only the input stream. However, the rules of a specific game or platform may prohibit automation regardless of the connection method, so the hardware format does not guarantee that the setup is permitted or undetectable.
Why Makcu is called an ESP32-S3 Arduino Development Board
In marketplace listings, the word Arduino usually describes the board's ability to program the ESP32-S3 through Arduino IDE and the Arduino-ESP32 package; it is not necessarily the board's brand. The chip supports built-in USB, CDC, and DFU modes, so firmware can be loaded without a separate USB-UART converter when the board layout exposes the controller's native USB connection.
Developers may use Arduino IDE, ESP-IDF, or a manufacturer's flashing utility for standard projects. With Makcu, however, you must account for its two microcontrollers and the role of each port. Uploading a generic 'ESP32-S3 Dev Module' sketch may overwrite the working firmware on one side. To configure Makcu for compatible software, use the dedicated firmware file and flashing tool instead of a generic Arduino example.
How to choose Makcu and avoid buying a standard ESP32-S3
The listing title does not guarantee compatibility. Before paying, ask the seller to confirm the revision and compare real photos with the following checklist:
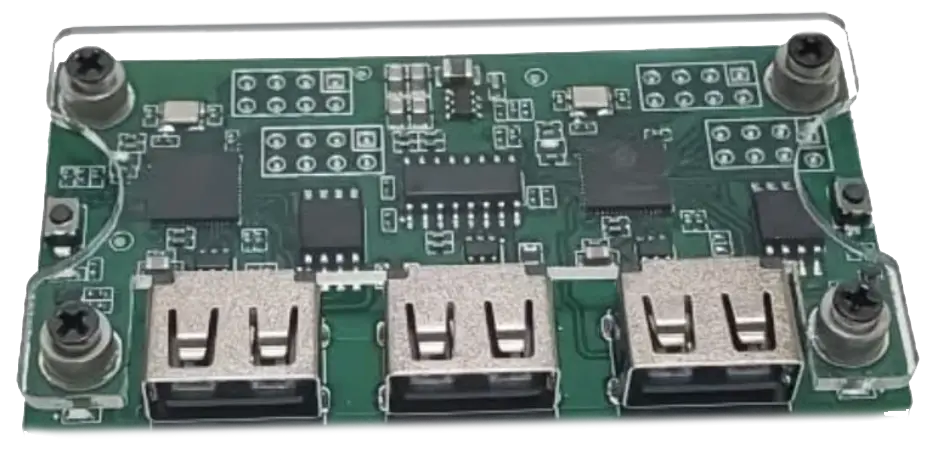
- Three USB ports. On the correct board, they are arranged in a single row. The two outer ports serve different ESP32-S3 controllers, while the middle port is used for the control connection.
- Two Boot buttons. There should be one button near each side. They are used to place each controller into download mode independently.
- Two microcontrollers. If the photo shows only one ESP32-S3, you are looking at a different board, even if the seller added MAKCU to the title.
- Two data cables. A charging-only cable will not work. Confirm how many cables are included in the package and which connectors they use.
- Firmware status. "Pre-flashed" means ready to connect; "unflashed" requires you to flash both sides yourself.
- Case and insulation. An open board is cheaper, but a protective case reduces the risk of short circuits, accidental presses, and mechanical damage.
- Reviews for the exact revision. Look at buyer photos, not just the seller's renders. Pay attention to USB stability, the included cables, and whether both Boot buttons work.
The market has many standard ESP32-S3 DevKits that are suitable for Arduino projects but lack the Makcu USB scheme.
Where to buy a Makcu ESP32-S3 board
Makcu is sold under names such as MAKCU Development Board, MAKCU Key&Mouse Box, ESP32-S3 Arduino Development Board, and MAKCM. A bare board is often listed around USD 20–30, while a kit with a case, cables, testing, and local delivery usually costs more. Compare the total order cost rather than only the headline price.
| Where to look | Advantages | What to check |
|---|---|---|
| AliExpress, Taobao, Temu | Wide selection of boards, cases, and cables | Revision photos, number of cables, firmware, reviews, and buyer protection |
| Online stores in your country | Faster delivery, easier returns, and clearer communication | Whether the listing is for Makcu rather than a standard ESP32-S3, and whether a case is included |
| eBay and local ads | You can find a local warehouse or an assembled kit | Whether the listing is active, board condition, return terms and final price |
| Specialized kit | Testing, firmware, case and cables are already included | Which version of the firmware is installed and what support is provided |
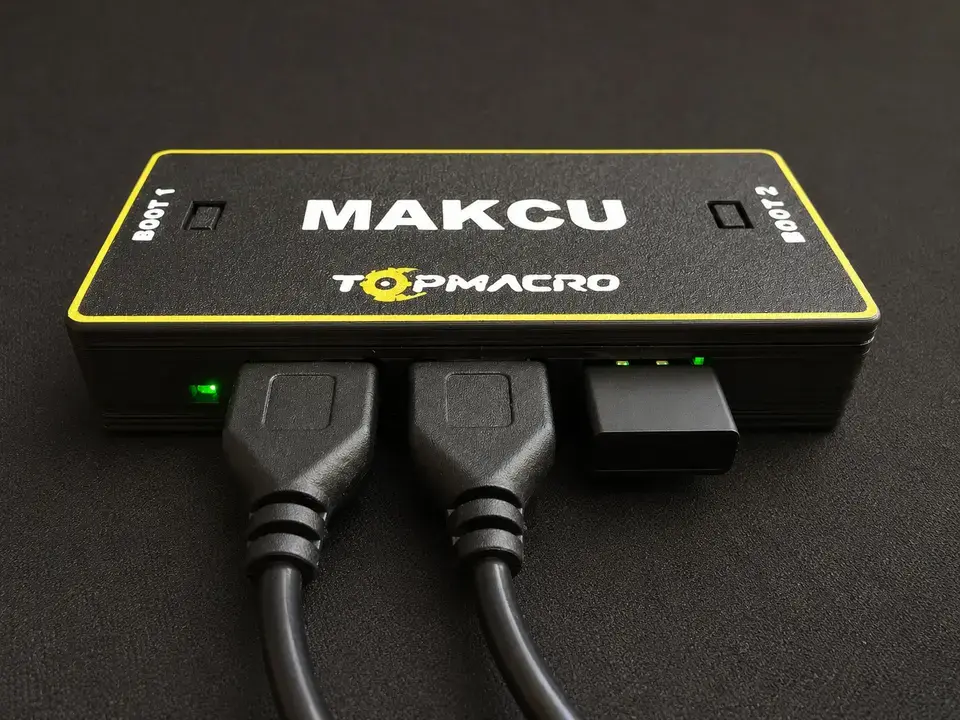
Makcu in the TopMacro case with two cables
The kit includes a pre-flashed and tested board installed in a protective case and ready to connect. It also includes two USB cables and a complimentary 30-day subscription to our macro software.
How to flash the Makcu ESP32-S3: a clear sequence
First, determine whether flashing is necessary. A pre-flashed and tested board should be connected and checked in normal mode before you attempt an update. If the seller explicitly marks it as unflashed, the device repeatedly reconnects, or support asks you to update the firmware, use a compatible flashing tool and firmware file.
The sequence below applies to the common dual-controller Makcu revision. Button labels in the flashing tool may vary, so open the current TopMacro guide with screenshots before you begin.
- Prepare the workspace.
Download the dedicated Makcu program from a trusted source, close other applications that may hold the COM port, and fully disconnect the board from USB.
- Switch the left side to flashing mode.
Hold down the left Boot button and, without releasing it, connect the cable to the USB1 port on the left. Release the button when the flashing tool detects the controller in download mode.
- Flash via USB1.
Select the action for the left side — it is usually labeled as USB1 Flash. Do not disconnect the cable or close the program until you receive a success message.
- Fully disconnect the board.
After completion, detach USB and wait for a few seconds. Simultaneous flashing of both sides is not required.
- Repeat for the right side.
Press and hold the right Boot button, connect only the USB3 port on the right, wait for download mode, and start the USB3 Flash action.
- Reconnect the working setup.
Disconnect the board, then connect USB1 and USB2 and attach the mouse to USB3 according to your chosen configuration. Confirm that the COM port appears and the mouse moves before starting any automation.
In universal Arduino-ESP32 documentation, entering download mode is done via BOOT and RESET, while ESP32-S3 supports USB CDC and DFU. On Makcu, the role of buttons and ports is determined by its layout, so standard DevKit instructions should not replace the guide specific to this revision.
How to connect Makcu after flashing
On a common revision, three ports perform different tasks. Do not rely solely on the position of cables in random photos: check the labels USB1, USB2, and USB3 on your board or in the seller's documentation.
| Port | Purpose | What to connect |
|---|---|---|
| USB1 | USB device side | Main gaming computer or compatible device |
| USB2 | Control and COM communication | Computer, laptop or supported control device with software |
| USB3 | USB host side | Wired mouse or wireless mouse USB receiver |
For an Android setup, use an OTG adapter that supports data transfer. A charging-only adapter may supply power without establishing a USB data connection. In a two-computer setup, the control software runs on the second device; in a single-PC setup, both USB1 and USB2 connect to the same system.
Begin testing with all automation disabled: make sure the mouse is detected, the cursor moves normally, the buttons and wheel work, and the control software detects the COM port. Only then load a profile. Detailed diagrams for one PC, two PCs, and Android are available in the extended Makcu connection guide.
Common mistakes after purchase and flashing
The board constantly connects and disconnects
For a new unflashed board, this may indicate missing firmware. Disconnect extra cables, switch the required side to Flash mode by holding its Boot button, and re-flash with a compatible file.
The program does not see the COM port
Check that the cable supports data, try another USB port on the computer, and close Arduino Serial Monitor, terminals, and other utilities that may be using the port. Compare the list of available ports before and after connecting the board.
Only one side was flashed
USB1 and USB3 are connected to different controllers. A successful write on the left does not automatically flash the right side unless your tool explicitly provides this.
The mouse receives power but does not move
Make sure the mouse or its receiver is connected to USB3, the control software is communicating through USB2, and both controllers have matching firmware.
The device operates unstably
Replace thin or excessively long cables, remove any passive USB hub from the setup, and check the connectors and power supply. Instability is often caused by a cable with unreliable data lines rather than by the microcontroller.
Arduino IDE overwrote the working firmware
Do not upload another sketch to the second controller. Restore both sides with the recommended firmware version, then reconnect the board in its normal configuration.
Safe operation and platform rules
Use Makcu only in scenarios allowed by the software, game, server, or tournament rules. A hardware device does not override the user agreement or guarantee immunity from penalties. Do not trust advertisements promising '100% undetected': no such claim can be verified against every future update.
Before updating, save the revision number and current firmware version; do not install unknown executables and verify the download source. Do not connect an open board to metal surfaces; a case provides benefits beyond aesthetics by protecting against short circuits.
Sources and additional documentation
This material was written from scratch and checked against technical primary sources. Its wording and structure do not copy the pages listed below.
- Espressif: USB CDC and DFU for ESP32-S3
- Open source project MAKCM on GitHub
- MAKCU documentation: purpose of the three USB ports
- TopMacro: current files, firmware images and connection diagrams
Sources and links verified on August 2, 2026. Product availability and prices on marketplaces may change.
FAQ
Frequently asked questions about the Makcu ESP32-S3
Is Makcu a standard Arduino ESP32-S3 board?
No. In the listings, the words Arduino and ESP32-S3 describe the compatible software ecosystem and the microcontrollers used. For Makcu you need a specialized board with two ESP32-S3 chips, three USB ports, and two Boot buttons. A standard single-chip ESP32-S3 DevKit does not replace it.
How many USB cables are needed for Makcu?
A standard working setup usually requires two data-capable USB cables: one connects USB1 to the main device, while the second connects USB2 to the control software. The mouse or its USB receiver plugs into USB3.
Does the ready-made TopMacro kit need flashing?
No, the branded ready-made kit comes pre-flashed and tested. Re-flashing without necessity only adds the risk of choosing the wrong port or an incompatible file.
Why are both sides of the board flashed?
Makcu uses two ESP32-S3 chips: one side communicates with the computer, while the other handles the connected USB device. Compatible firmware is therefore installed separately through the left USB1 and the right USB3.
Can a Bluetooth mouse be connected directly?
Direct Bluetooth pairing is not part of the standard setup. Use a wired USB mouse or a wireless mouse with a separate USB receiver plugged into USB3.
How much does the Makcu ESP32-S3 cost?
The price depends on the revision, case, number of cables, firmware, shipping, and local availability. Some standalone boards are listed around USD 20–30, while tested ready-made kits cost more. Compare the complete package, not the headline price alone.